Corporates and institutions often accept information from public through online forms. The best (Non Google) form creation websites have already been discussed which do provide a lot of facilities. Often the best of them are disguised behind the paid ones. These are mostly inaccessible to the general web owners as the professional ones need a note for shelling out money from their firms and the freelancers just don't have the money.
One such facility is the automated response which one receives after he/she has filled up an online form which might say "thank you for your responses" or something. The facility, though available on Google docs is not readily available. You would not see fancy buttons to facilitate your auto responding form. So, you'll have to do it yourself.
For this purpose an app needs to be created. The app will obviously have a script. but fret not, as most part of the script is already filled by Google. you just need to add a small snippet and your work will be done. Following are some really simple steps with instructive screenshots which will help you create an auto responding form which has the ability to send emails to the filler. But, do read the special note so that things go smoothly.
Step 1:
Firstly you need to create a form at google Docs. The form creation has been explained pretty clear article at codemakit.
Step 2 :
Now assuming you are accepting the responses in a google spreadsheet, You then need to open the spreadsheet where the responses for the form are stored.
Step 3 :
You will land on the Google Script Window where you need to select, which script do you need to create. Since we're creation a script for a spreadsheet, click spreadsheet. A scipt will then be visible to you. Do not modify any code, Just add another piece of code given here.
The Code
Edit the code to your wishes, Do check the notes to understand the functioning.
| function formSubmitReply(e) { var userEmail = e.values[2]; MailApp.sendEmail(userEmail, "Yo! Thanks for your time", "Thanks for submitting your information to us, \n\n", {name:"Help Desk"}); }; |
Note.
One must understand the intricacies of the code and not use it mindlessly.
formSubmitReply is a function, which handles events, this is the function that initiates the action. It has a parameter 'e' which basically is an array filled with values. Have a look at your spreadsheet containing responses, First one will always be the timestamp. If your table consists of 2 questions, ie.e 'Name' and 'email' address, you will have to put the array value as e[2] so that the app would know where to send the response.
Also the name of the sender is taken as "help desk" Which can be changed to suit your needs.
Step 4 :
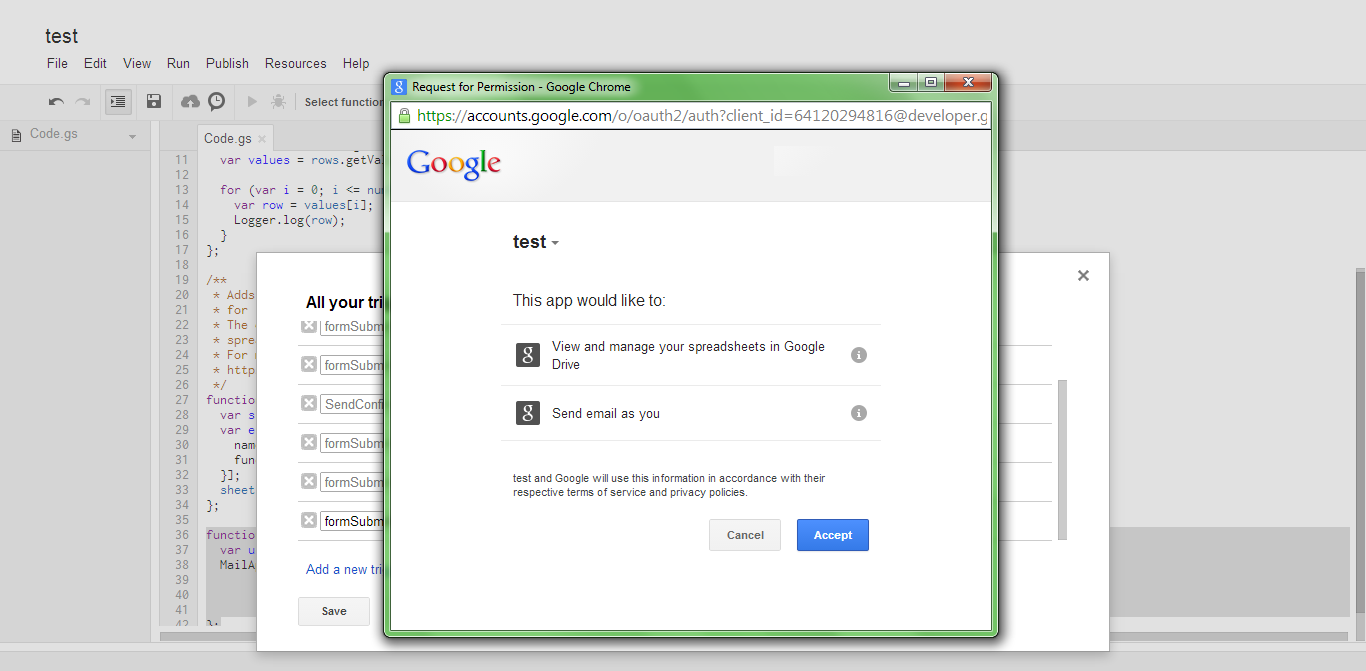
Now you need to set a trigger for the script you just set. Click on resources menu and select "All your triggers". You will see a window stating all your triggers, Click on "create new", which will create a new trigger instance. Select values from the dropdown window as is done in the screenshot below.Step 5 :
You might be presented with an authorization window where you need to click yes to go forward. Once you've authorized the app. Your form will start sending automatic responses to anyone who fills your form with an email address.
Related Reading
- If you're unsure, why you need an online form, you can check out Why Online forms, A study (Part One) and the rest can be found out at Why Online Forms, A study (Part Two)
- Need help creating a form using Google Forms, Try this.


.png)

.png)