For most bloggers the value of a screenshot is immense and so is its upload to your ftp. So here are some tips for screenshot users.
Bellow are some techniques used normally
1. > After you grab a screenshot with the Print Screen key or some external screen capture utility, your first save that captured image to the desktop and then upload it online to your blog, Flickr or some other image hosting service.
2. > Some bloggers even combine the 2 steps and use certain websites which do the same work for them. Some of them are listed here.
 4. > For blogger users - To upload a photo, sign into Dashboard, select the blog, click the
POSTING tab and select either NEW POST or EDIT POST. Then in the post
editor, look for the "uploading photo" icon in the toolbar.
Bellow are some techniques used normally
1. > After you grab a screenshot with the Print Screen key or some external screen capture utility, your first save that captured image to the desktop and then upload it online to your blog, Flickr or some other image hosting service.
2. > Some bloggers even combine the 2 steps and use certain websites which do the same work for them. Some of them are listed here.
- Kwout.com - Kwout is an online screen capture service that requires no downloads
- Shup.com - Shup sits in the system tray and can capture the full desktop or the active window
- Clip2Net.com - This is actually a file sharing service like Rapidshare but they also want people to use their service for sharing screen captures.
- Skitch.com - This is the the favorite screen capture application of Mac users that captures, annotates and uploads.
- Picnik.com - Picnik, the popular online image editor, provides a free Firefox add-on that can capture webpages and automatically load the images into Picnik for editing online.
 4. > For blogger users - To upload a photo, sign into Dashboard, select the blog, click the
POSTING tab and select either NEW POST or EDIT POST. Then in the post
editor, look for the "uploading photo" icon in the toolbar.
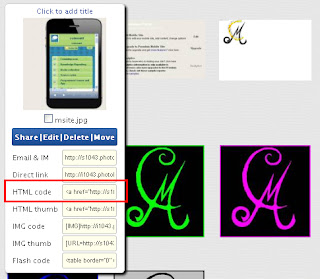
5. > There are also other ways to upload photos. You can use external photo hosts like Photobucket. You will have to start an account with them, and once you have done that, you can upload your photos,
and then use the uploaded photos to post to you Blogger blog.
Article Number UAN#025CMKT


.png)

.png)